How to do Triangle Pose
Triangle pose
With this pose I would suggest going with what feels good in your body rather than what you see in a picture. A modified version can actually be more difficult because you are doing it correctly. We can easily just put our hands where we see them in a picture but there’s so much more to that pose.
Different yoga traditions have slightly different ways of getting into triangle - so the real question is what are you looking for from this pose? This will inform how you do it
1.
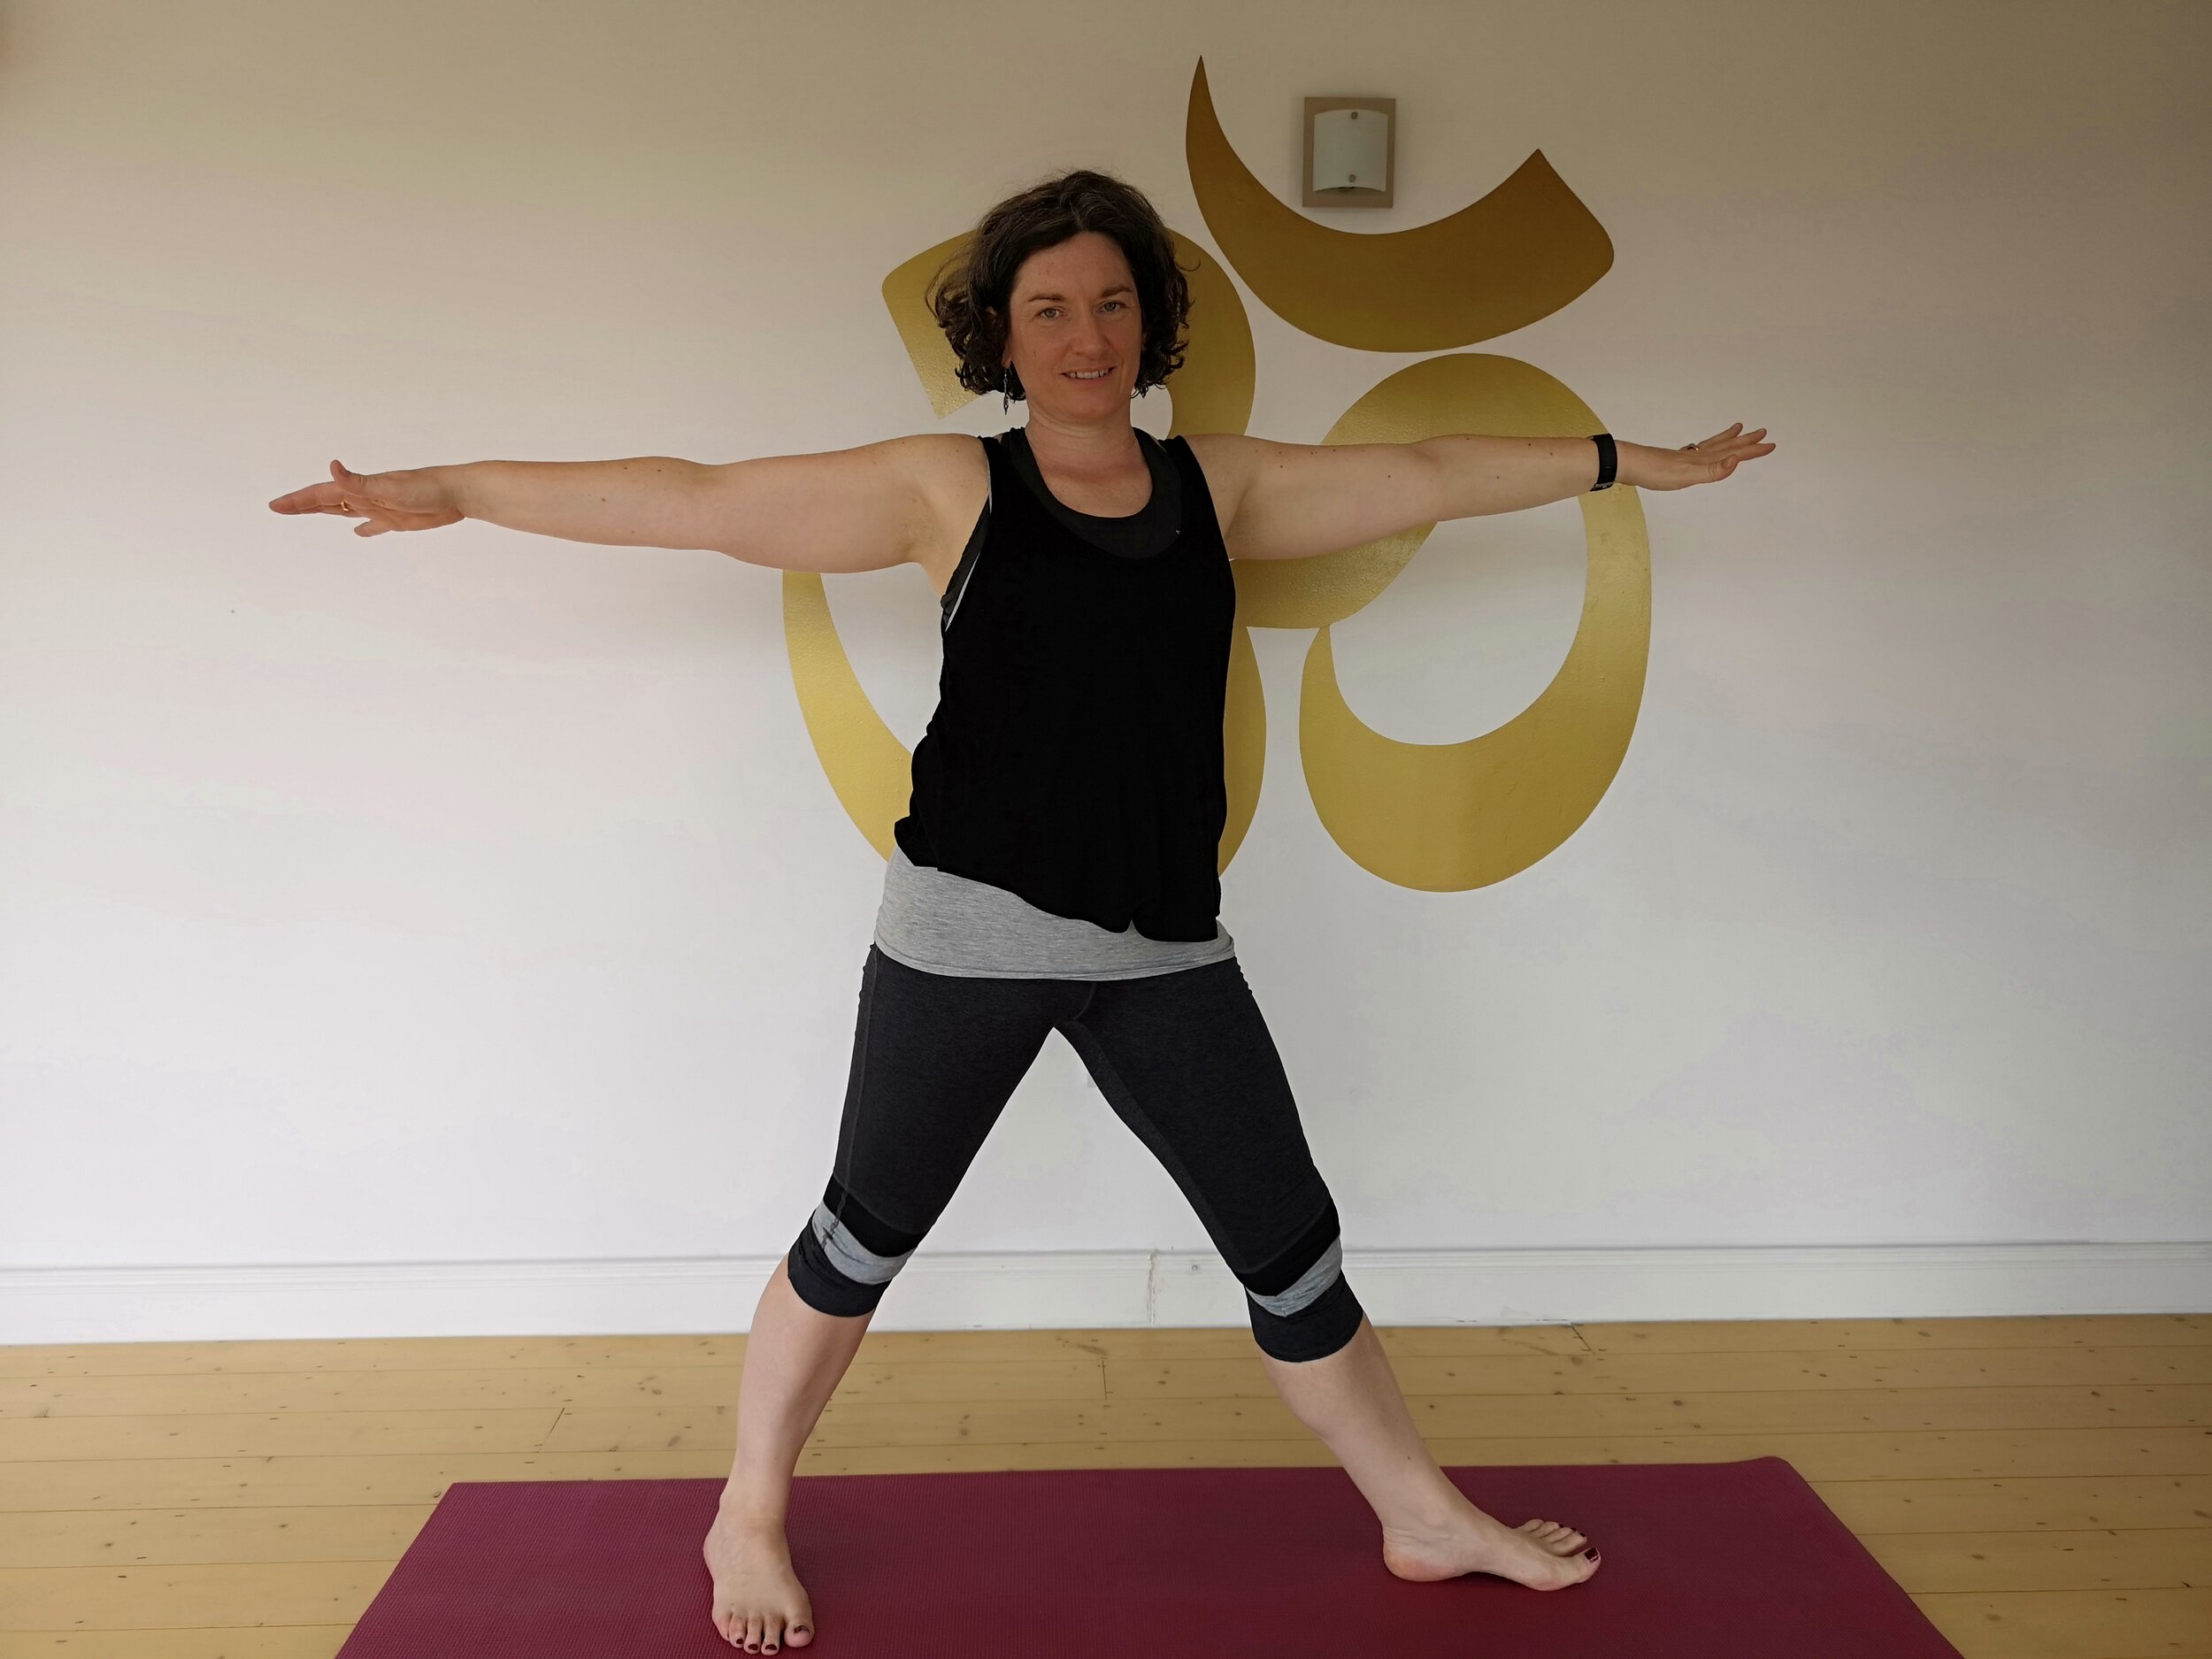
Beginning with the feet. The feet are key. Begin in a wide stance with your front foot facing fully forward and your back foot roughly at a 45°, towards the front corner of your mat. Your back foot should be at an angle that is comfortable. It is important that you are comfortable and stable. Being stable gives you a good base to build on, hence the importance of the placing of your feet.
For your hips you want to look at your front knee. Your knee should be in line with your ankle and not rotating or falling in. Keep the arch of your foot active to protect your knees. If you notice your foot rolling in, roll it out. Don't force the hips to look like a picture you've seen do what feels good. By forcing your hips parallel with your mat you could cause your knee to fall in and that can be damaging to your knee, hence we look at the knee and move our hips based on that.
2.
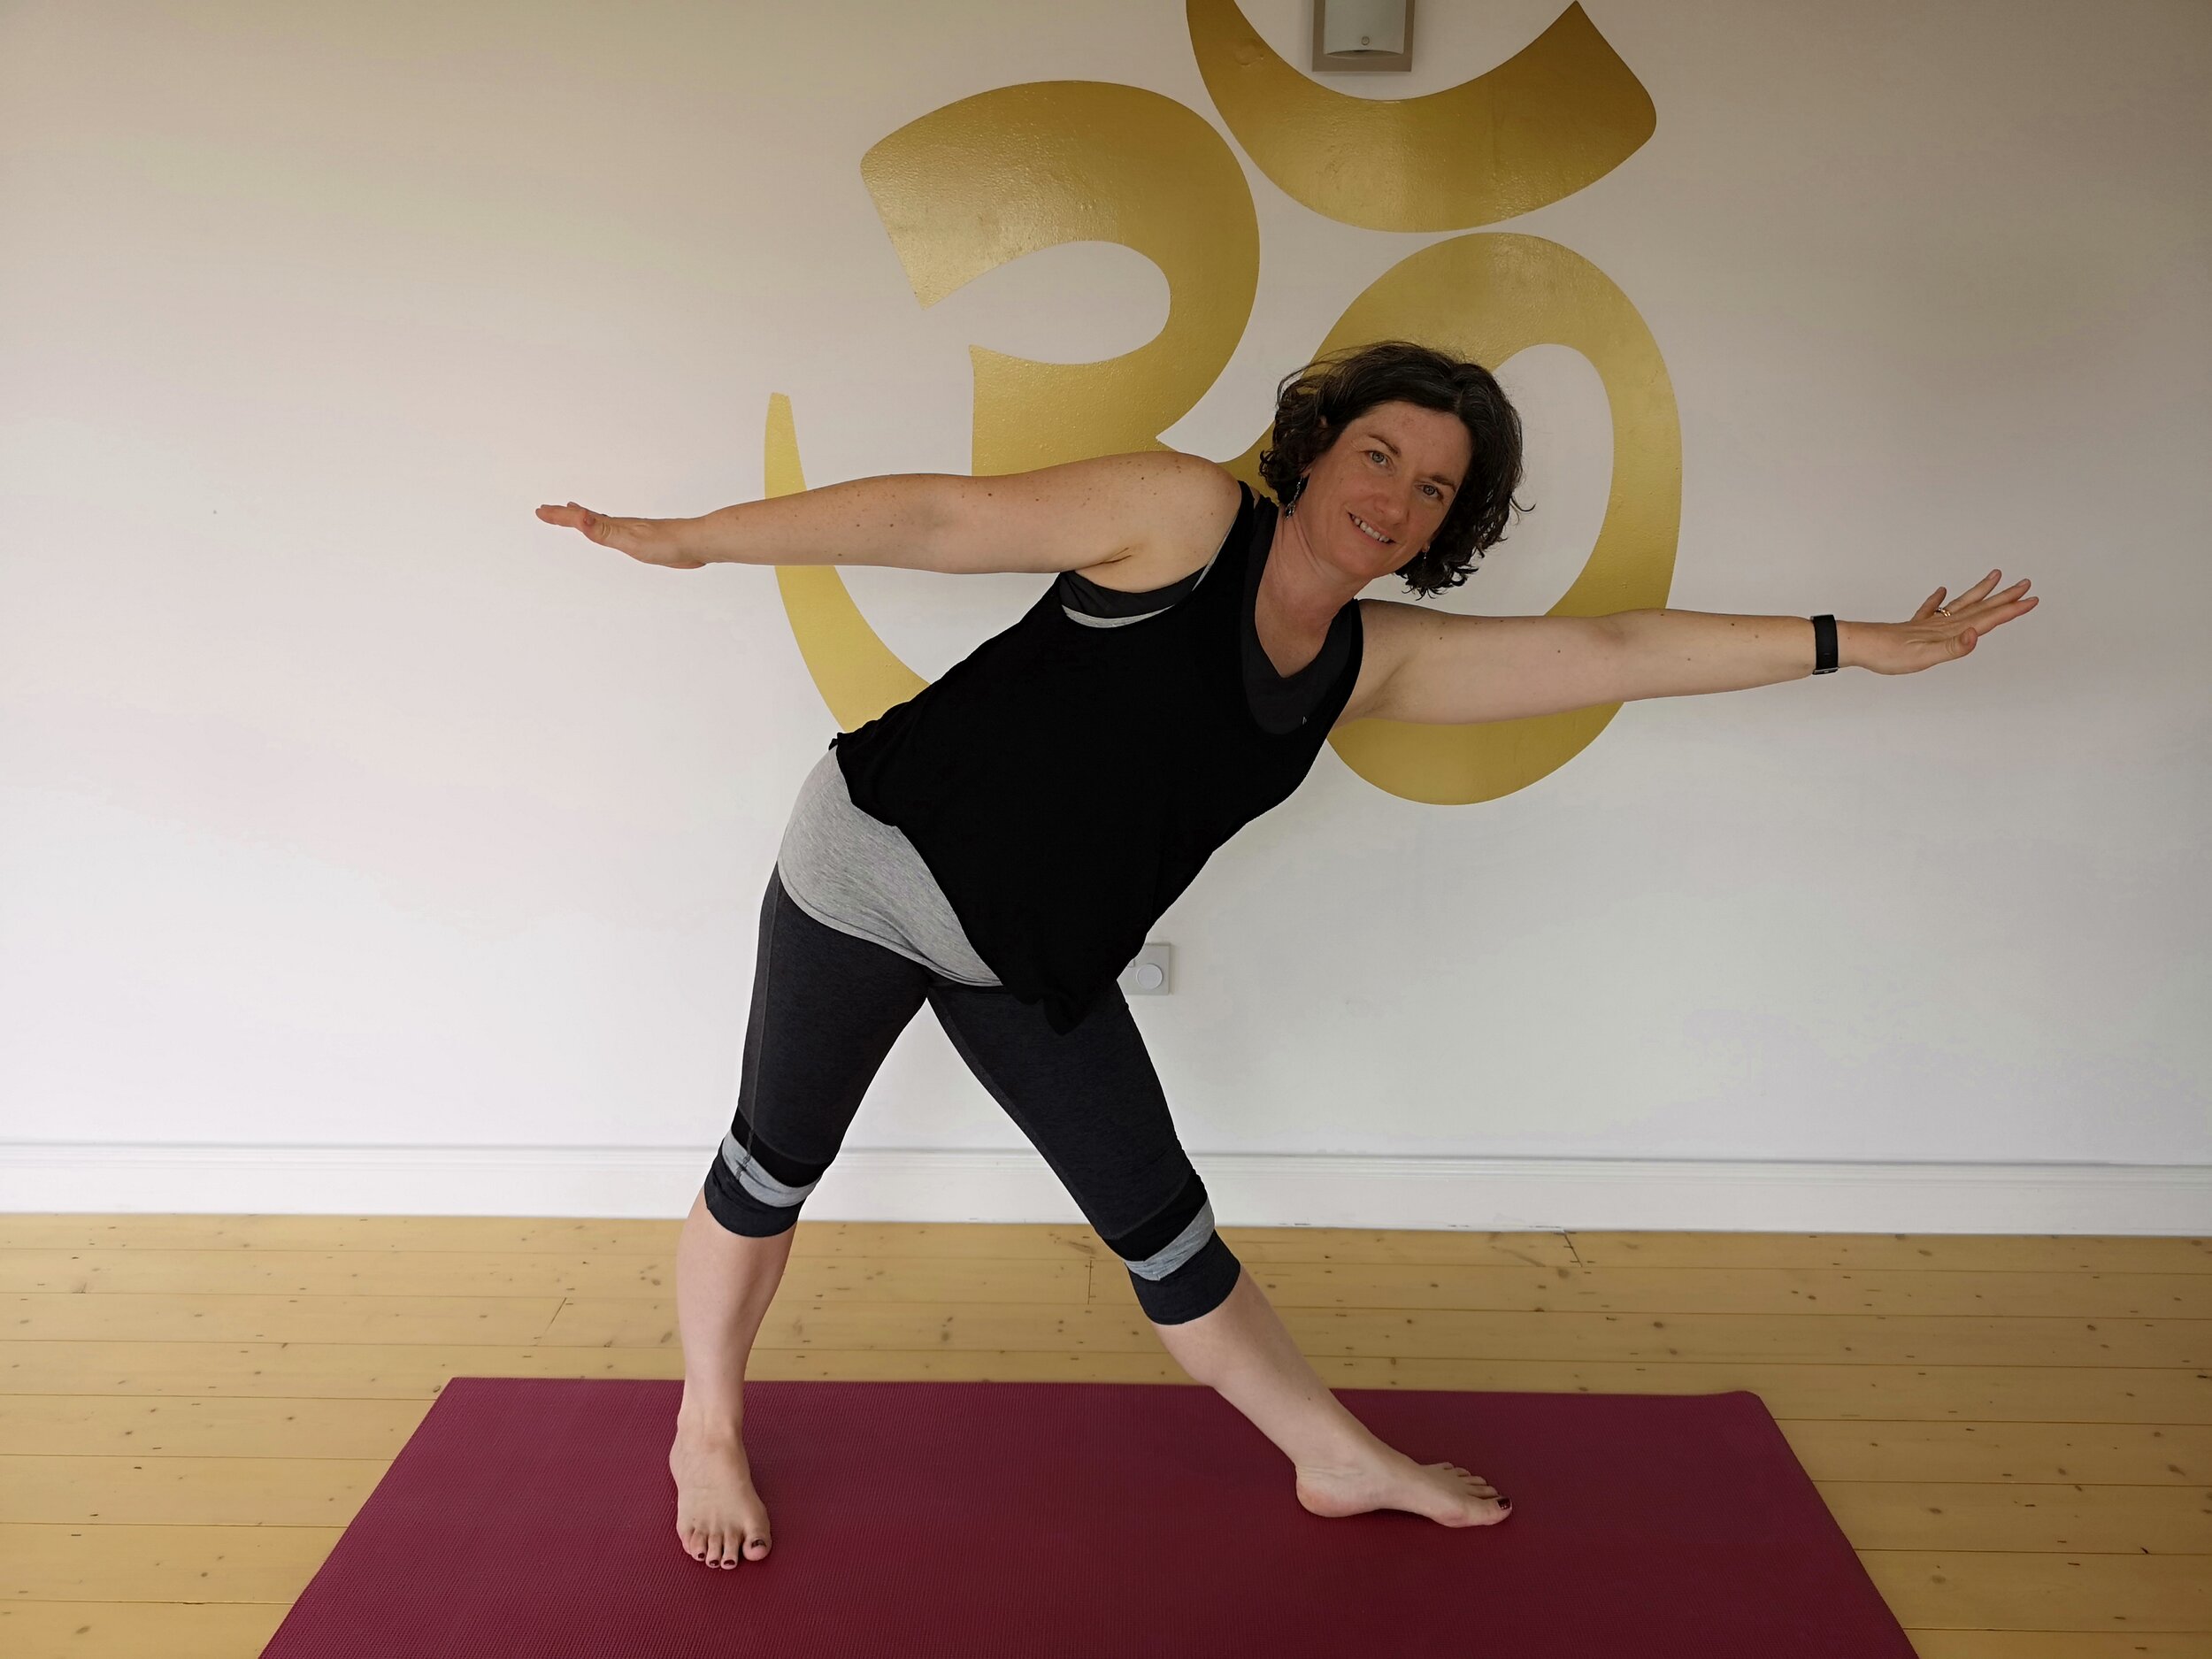
You can rotate your ribs and upper body so that your arms and shoulders are in line with the long side of the mat if you want. Leaving your hips as they are you can rotate your ribs. Then move your back hip out, sticking it out like your carrying a baby on your hip which automatically allows your spine to move towards the front.
3.
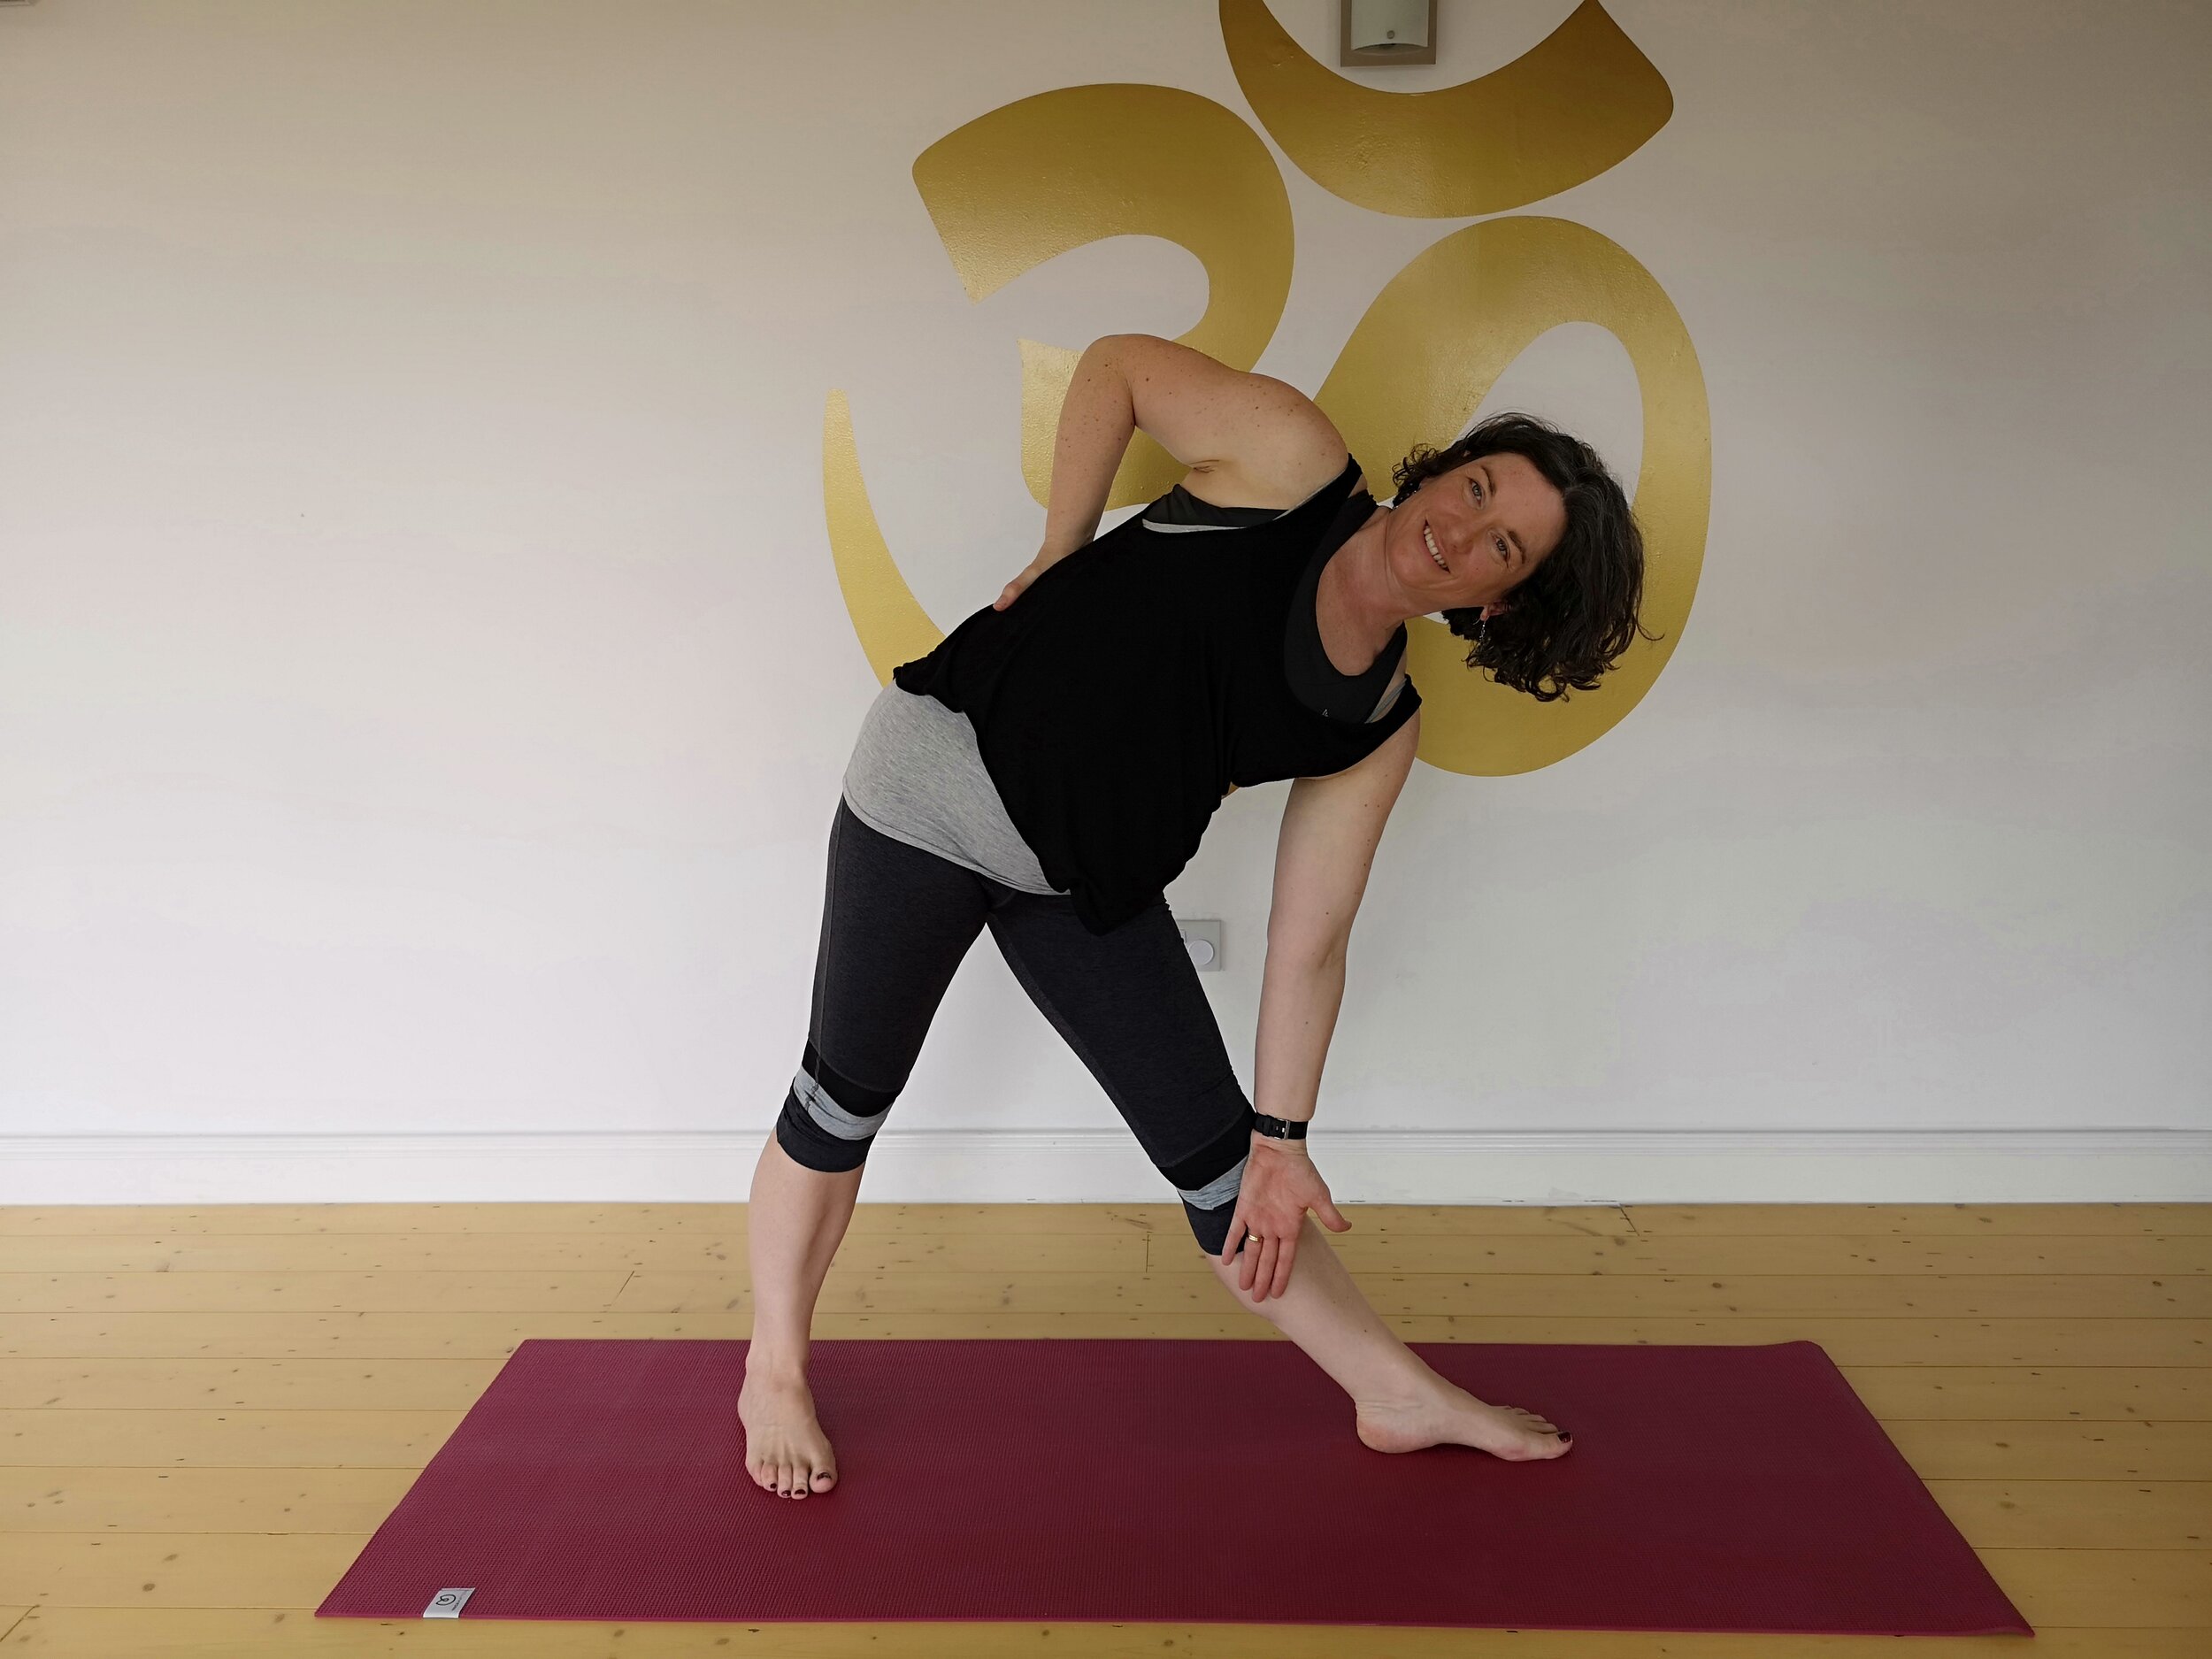
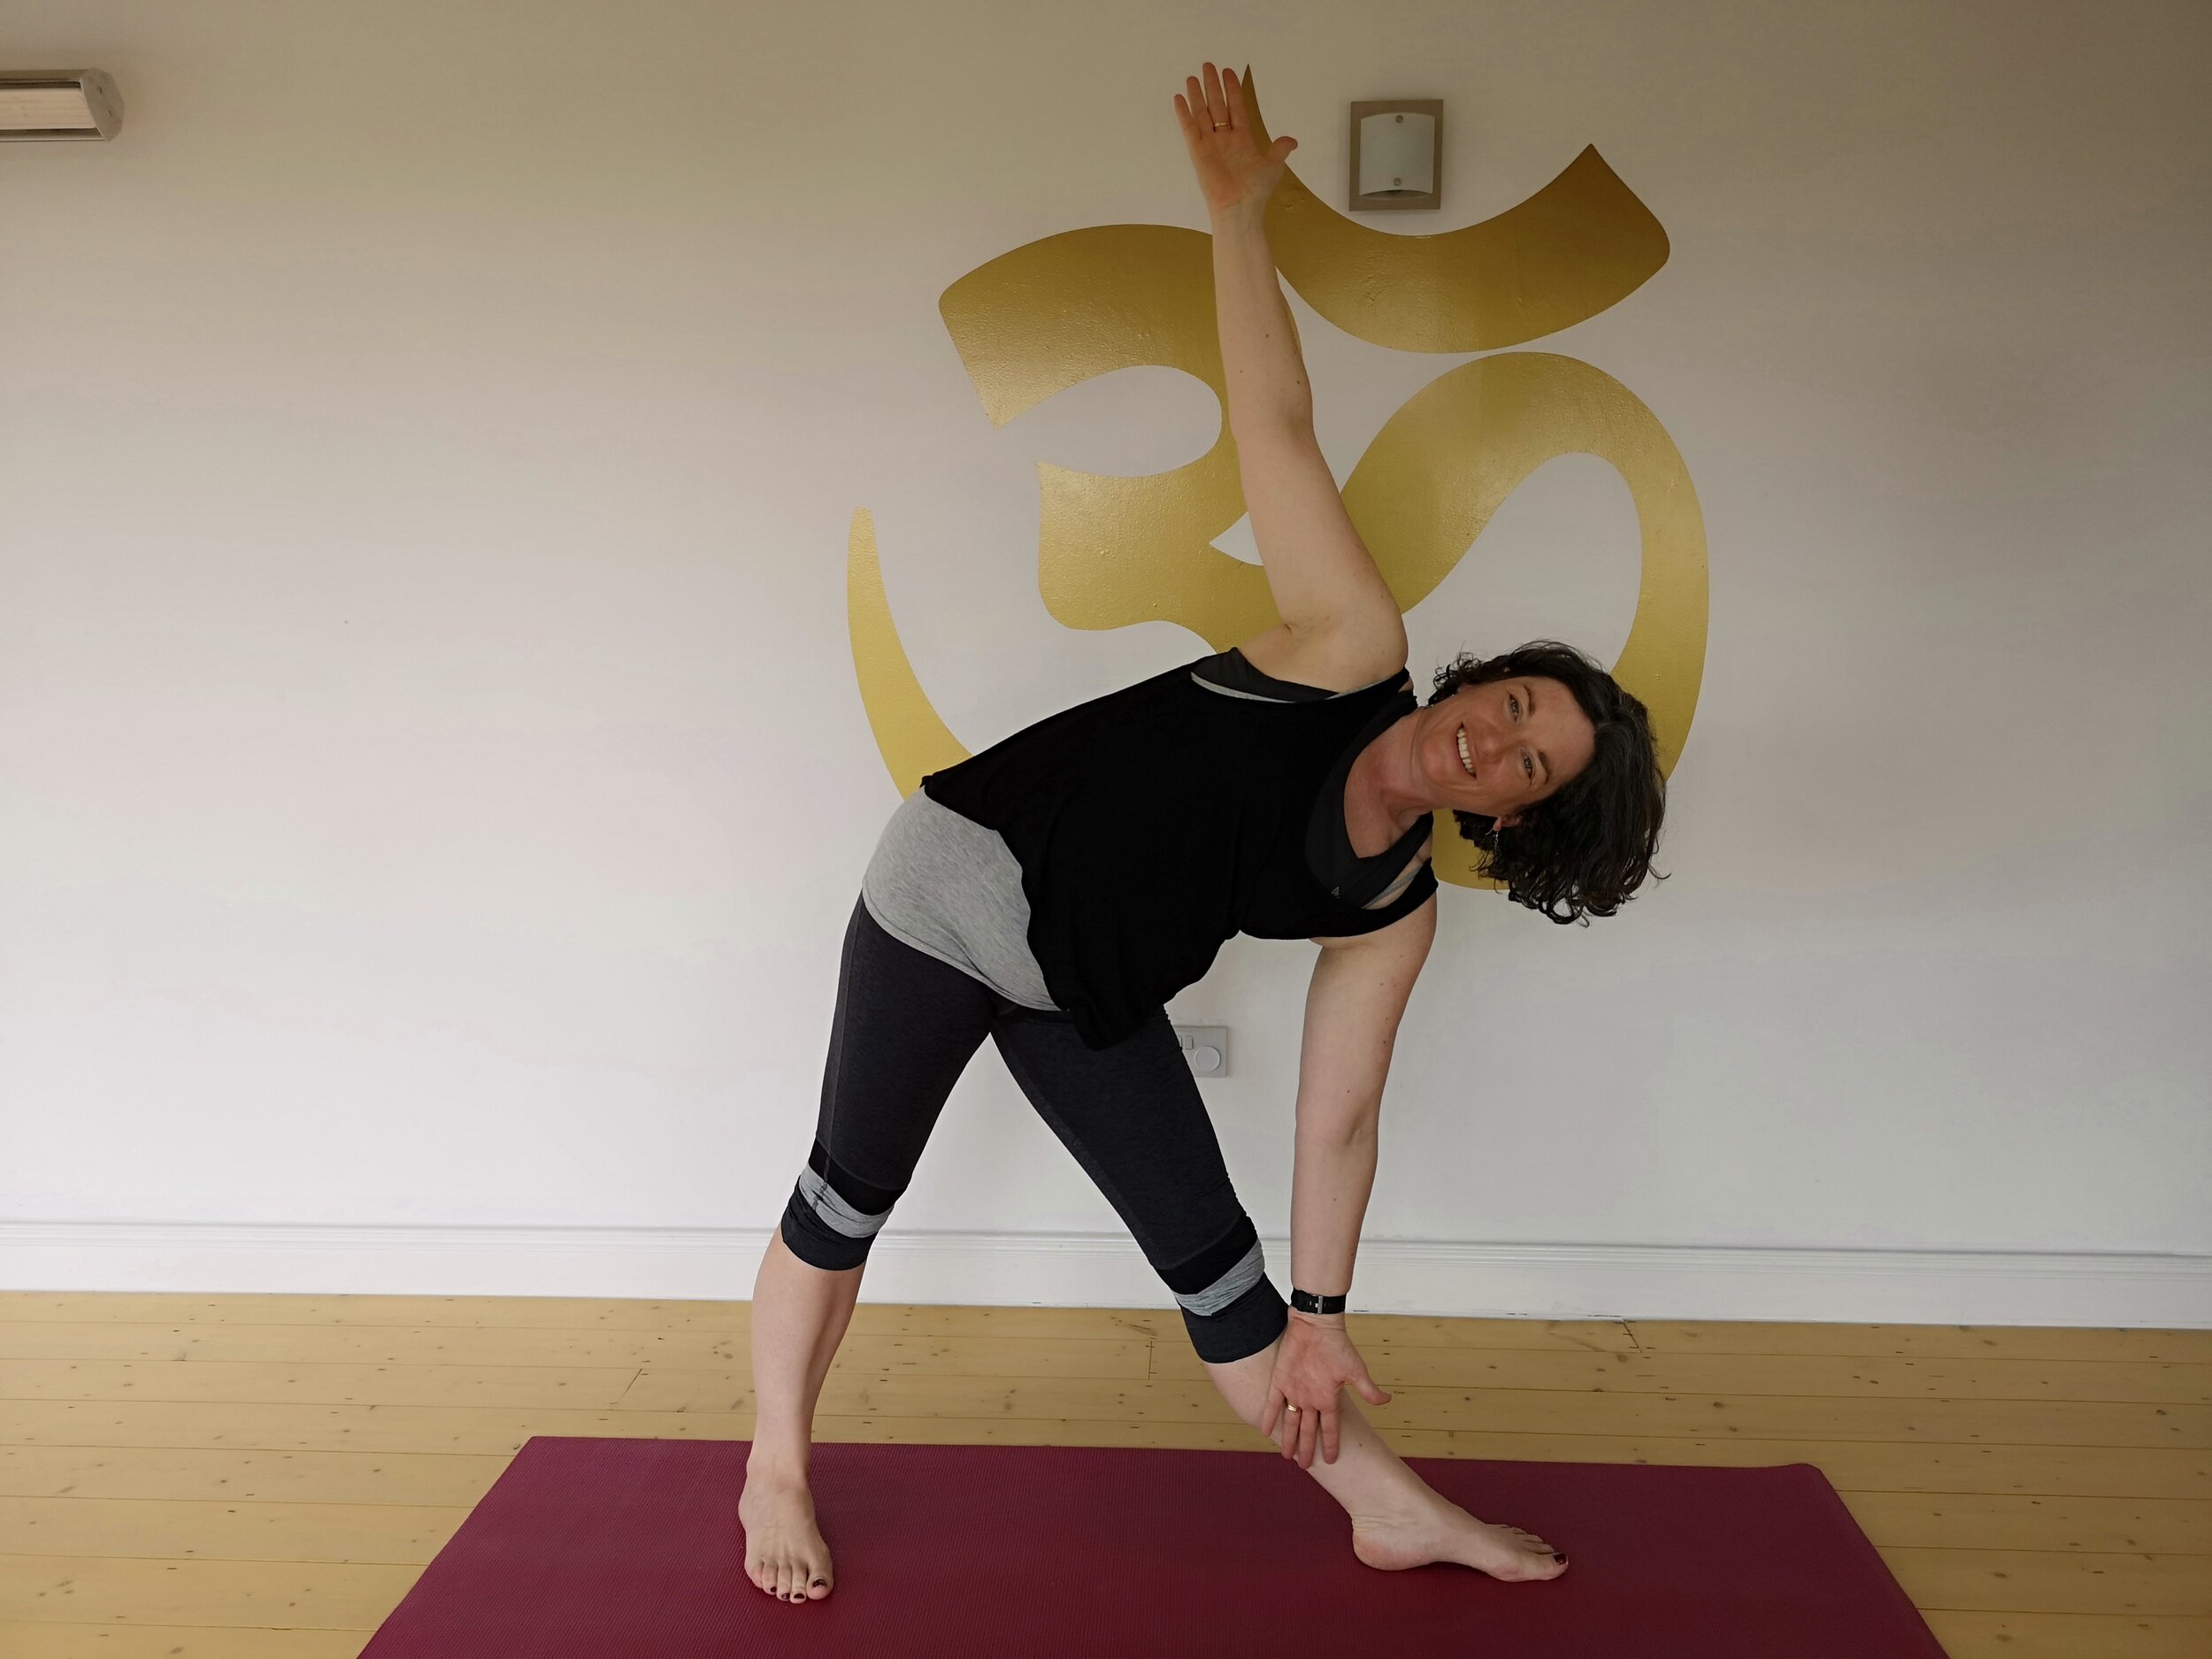
You want to keep your arm up and back, this will allow you keep your chest open. Take your arm down past your face and up to the sky, like a windmill. Once you have it back and up you can place it on the small of your back to keep your chest open.
This can be a more difficult pose as when you raise your arm sometimes your shoulder falls in a bit whereas when your hand is on your back your chest is more open.
4.
You can then take your hand up to the ceiling or leave it on your back. This depends on the mobility in your shoulder, so decide on the day if you want to do it. You can also take your bottom hand to your thigh or calf. Whichever feels good in your body, you want it to feel good in your body that day. Going through the steps and stop at whichever feels good rather than pushing your body past its limits.
Every body is different and every day is different. Remember we never want to go into pain when practicing yoga.
Modifications:
Keep your hands on your hips. You can then raise your top hand if you want
Play with your foot position - see if a wider stance or a narrower stance is more stable for you.
If you really love triangle and want to take it to the next level:
Practise by standing with your heels close to the wall, the wall will give you a lot of feedback. You can see where you are restricted where you twist. You get great feedbakck doing it against the wall.
Once you’ve mastered that you can try revolved triangle - where you include a twist so you are now doing triangle facing the wall rather than away from the wall
New to triangle?
Start with side angle pose - this pose is similar to triangle so is a good pose to do before. Practice Side angle pose with a bent knee. When your comfortable with that then give triangle a pose angle at your own pace.